Announcement

Collapse
No announcement yet.

How To's ~ Creating a perspective view rug for an elevation drawing

Collapse
X
 
  • Filter
  • Time
  • Show
Clear All
new posts

  • How To's ~ Creating a perspective view rug for an elevation drawing

    Here are the steps to create a perspective view of a rug you have saved from a vendor's website to use in an Elevation Rendering.
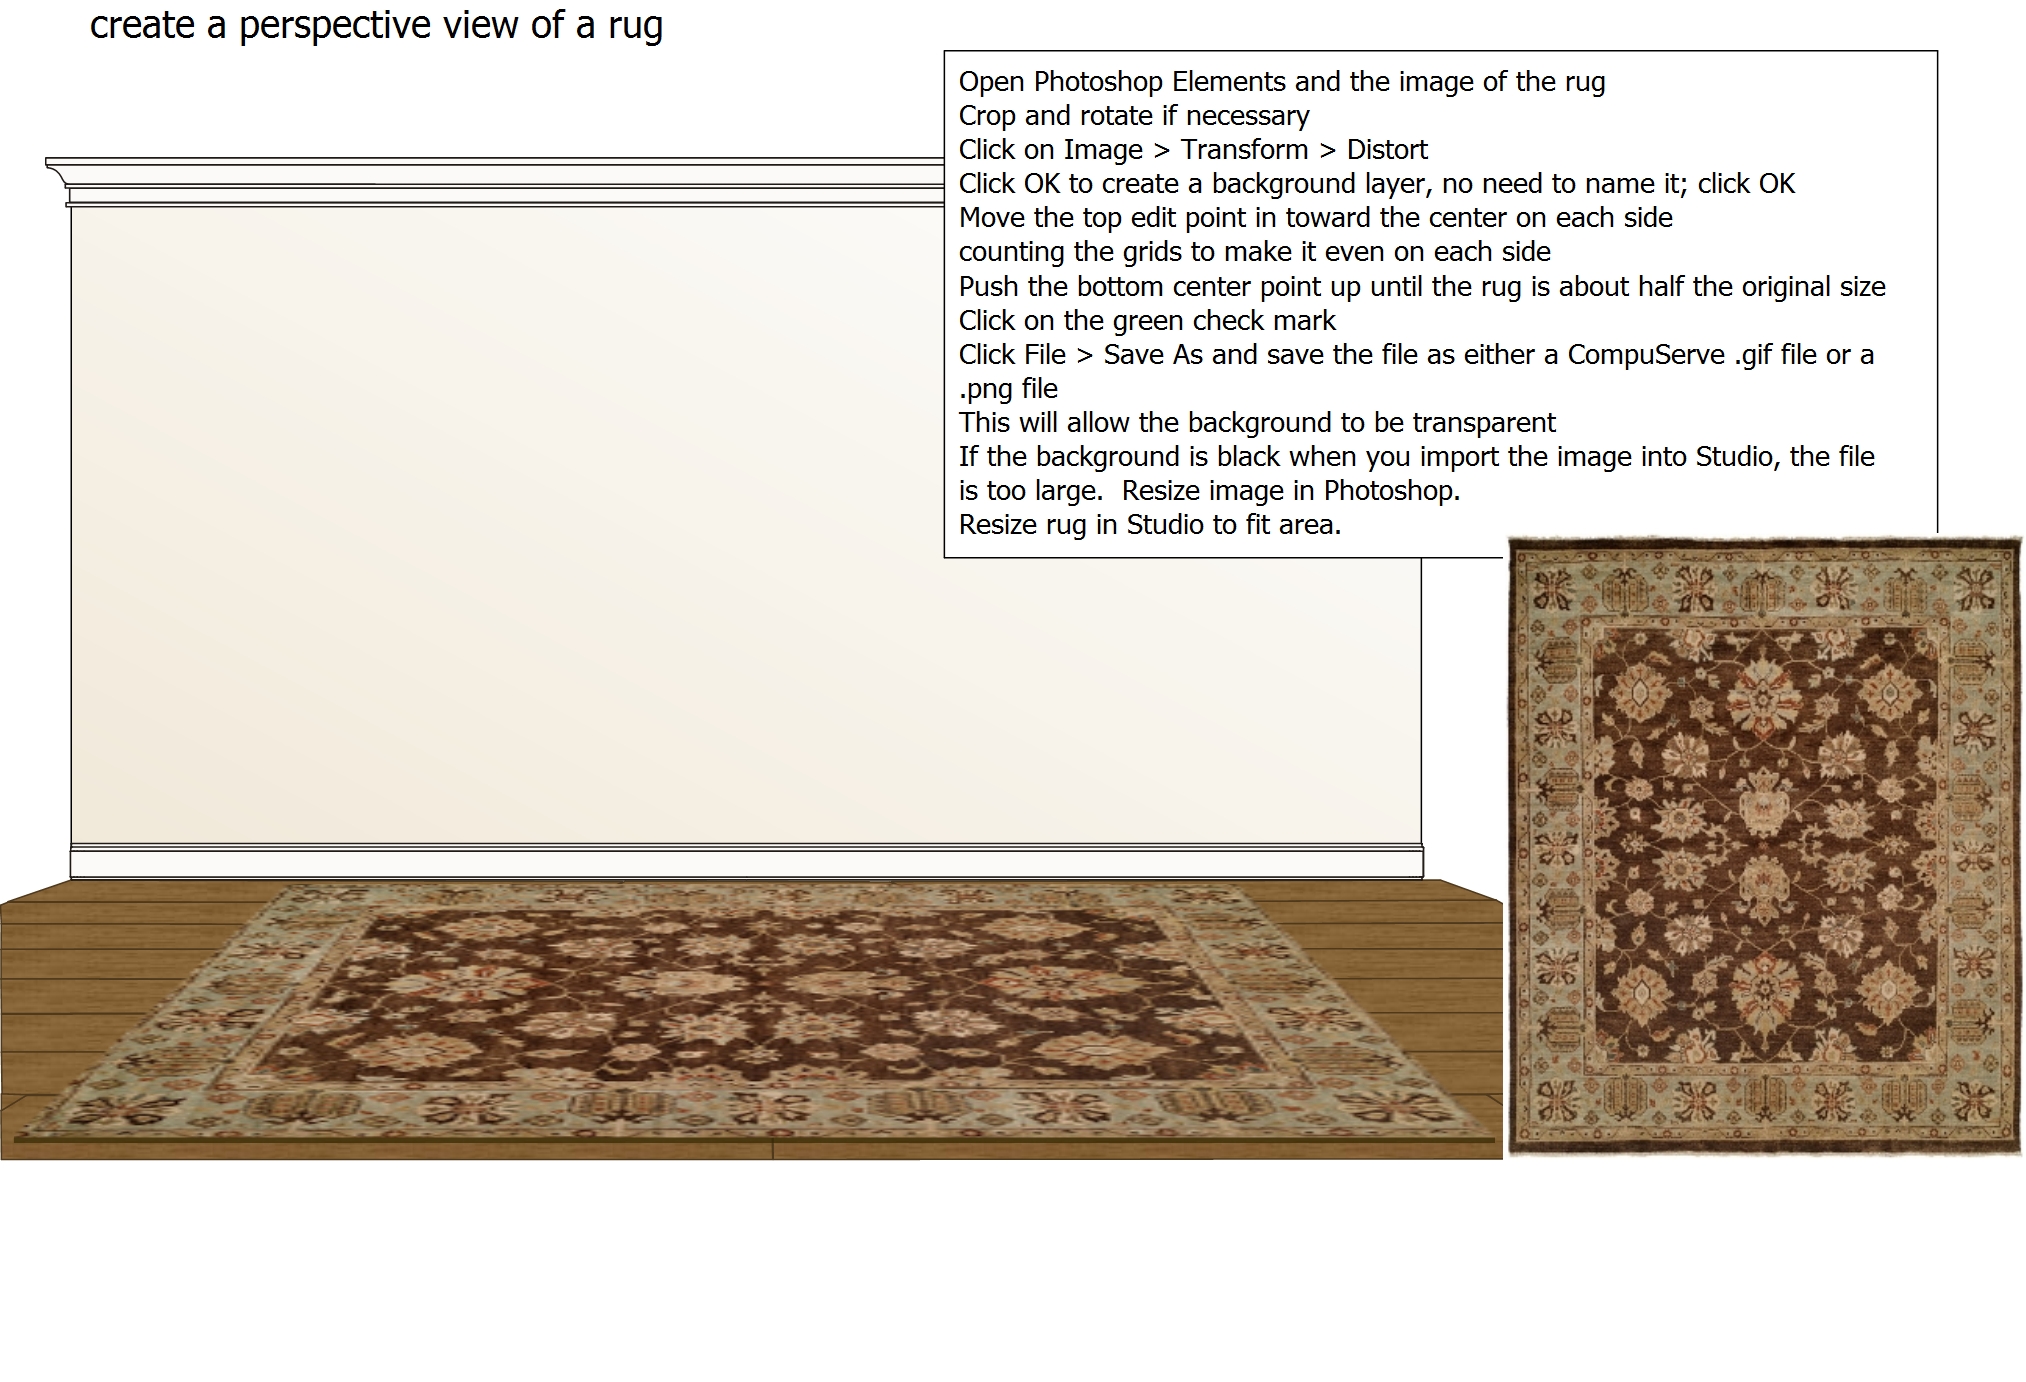
    1. Right click on the image, Save Picture As
    2. Open Photoshop and the image of the rug, rotate if necessary
    3. Click on Image>>Transform>>Distort; make this a background layer and name if you like but it's not necessary
    4. Place your cursor on the edit point at top left and move the corner in toward the center, repeat for right side, and move the center bottom up towards the top
    5. Click File>>Save As and choose either the Compuserve GIF or PNG file format
    by choosing that file type, your background will be transparent and you can place your rug anywhere in your rendering. If it appears in Studio with a black background after importing it, it needs to be resized - the file is too large. Try 800x600 pixels, for example. To resize an image in Photo Shop Elements
    Attached Files
    Last edited by Merlyn; 03-19-2013, 07:24 PM.

  • #2
    Re: Creating a perspective view rug for an elevation drawing

    a few more little tips:
    add a tiny rectangle to the front edge of the carpet to give it the appearance of some thickness; match the color with the eyedropper tool.

    If your saved sample loses some of its fringe, drag on the D'kei bullion from the Embellish folder, duplicate, group and skew to fit the angle of the rug.

    Use the restore down function and have both Studio and Photoshop open at the same time so that you can check the angle of perspective you need to match your rendering floor angle.

    Comment

    Working...
    X